
| Note: In PowerBuilder 2017 R2, native support for Git was introduced into PowerBuilder. The techniques described in this article work for older versions of PowerBuilder. They work for 2017 R2 and later as well, but the native Git support introduced in 2017 R2 has better features and should be used instead. |
Back in 2003, Sybase introduced CodeXchange, an online forum that allowed developers to share code samples and collaborate on open source projects. Unfortunately, in 2009 Sybase decided to shut down that system. The PowerBuilder code samples that had been uploaded tp CodeExchange did eventually show up again in a CodeXchange section of the PowerBuilder wiki on SAP's SCN. Appeon also obtained permission from many of the authors to post those same PowerBuilder samples on the Code Samples section of the Appeon site.
However, the people who had collaborator projects on CodeXchange needed another option, because neither the SAP PowerBuilder wiki or the Appeon Code Samples site allowed for collaborative development. Aware of the pending shutdown, I moved the PFC and PBNISMTP projects to Microsoft's CodePlex.
Like CodeXchange, code in CodePlex could be access from PowerBuilder through a MSSCCI to SVN proxy product. That's because PowerBuilder uses an MSSCCI API to talk to source control systems, but both of those systems used an SVN API. A bridge product like PushOK SVN SCC translates the MSSCCI calls to SVN calls so that the client and the source code repository can communicate.
Unfortunately, Microsoft has announced that it intends to shutdown CodePlex on December 15th, 2017, That means those of use that moved our projects to CodePlex need to once again move them someplace else. One potential new location is SourceForge, which also supports an SVN API. In fact, Roy Kiesler put the PowerPrinter source code there back in 2001.
However, the site that Microsoft recommends as a replacement, and the one that has become the dominant open source hosting facility, is GitHub. The issue with moving to GitHub is that it uses a Git API rather than an SVN API, which means we need to find another proxy product to translate the MSSCCI calls to Git.
If we've been using the PushOK SVN SCC product to date to handle SVN, the first thing we might want to check out is their Git SCC product. Unfortunately all we would find when we attempt to download the product though is a 1.0 release candidate that was published in June of 2010 and hasn't been updated since. That's hardly reassuring. We might also note if we went back to their SVN SCC product that the last update of that was also a release candidate for supporting SVN 1.8 published in April of 2015 and not updated since. Subversion 1.9 was released in 2015 and the current version is 1.9.5. It appears that PushOK has ceased development of their products sometime in the last two years.
Fortunately, there is an alternative. A bit of searching turned up a the Git MSSCCI provider from PB Software. It not only works, but it's free. It's also being actively supported. There have been releases in 2014, 2015 and 2017.
I'm going to walk through how to configure PowerBuilder to use the PB Software provider to connect PowerBuilder to GitHub. Perhaps because of my somewhat limited experience with Git (I've used the GitHub desktop to host a JavaScript project there and the GitHub extension for Visual Studio to host a C++ project there. Those were pretty idiot proof. Configuring PowerBuilder to use the Git MSSCCI provider takes a bit more work. A owe a lot of thanks to Bob Piscak of PB Software for walking me through some of the issues.
1. Download the zip file with the provider and unzip it to your file system somewhere. I chose to put it under the C:\Program Files(x86) directory, specifically at C:\Program Files (x86)\pbsGitMSSCCIV1build0007.
2. Add that directory to your system path.
3. The provider does not automatically create the registry entries needed for PowerBuilder to find it as a source control provider, despite what the readme document that comes with the download indicates. Instead, add the following to your registry (modified as needed to match the location where you installed the provider in step 1.). These entries are for a 64 bit machine. If you're on a 32 bit machine still, simply remove the Wow6432Node portion of the keys.
[HKEY_LOCAL_MACHINE\SOFTWARE\Wow6432Node\SourceCodeControlProvider]
[HKEY_LOCAL_MACHINE\SOFTWARE\Wow6432Node\SourceCodeControlProvider\InstalledSCCProviders]
"PB Native"="Software\\Sybase\\PowerBuilder\\12.6\\Native SCC"
"PBS Git MSSCCI"="Software\\PBSoftware\\PBSGitMSSCCI"
[HKEY_LOCAL_MACHINE\SOFTWARE\Wow6432Node\PBSoftware]
[HKEY_LOCAL_MACHINE\SOFTWARE\Wow6432Node\PBSoftware\PBSGitMSSCCI]
"SCCServerName"="PBS Git MSSCCI"
"SCCServerPath"="C:\\Program Files (x86)\\pbsGitMSSCCIV1build0007\\pbsGitMSSCCI.dll"
Bob did indicate that he was looking and creating another build that would produce those entries automatically when regsvr32 is run on the DLL.
The Git MSSCCI provider expects the PowerBuilder project to already be in a local Git repository, so we're going to create that now.
4. Download and install TortoiseGit. Not absolutely necessary, but I like to with with a GUI rather than the command line and TortoiseGit serves as the GUI for some of the initial work we need to do with Git.
5. Create a GitHub account if you don't already have one.
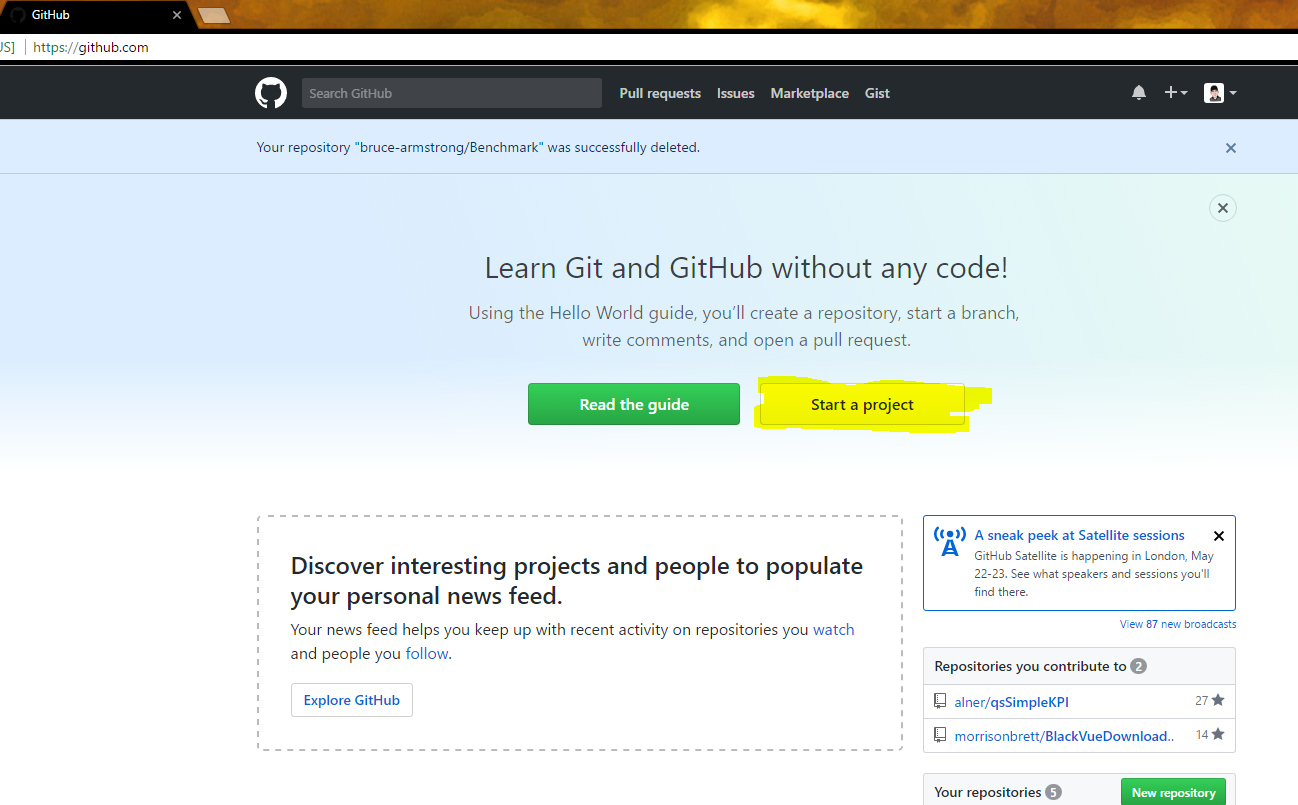
6. Create a new repository in Github for your project. Leave it empty right now.
a. Select create project from the main page.
b. Give it a name and hit Create Repository. Leave the checkbox to create a readme file unchecked.
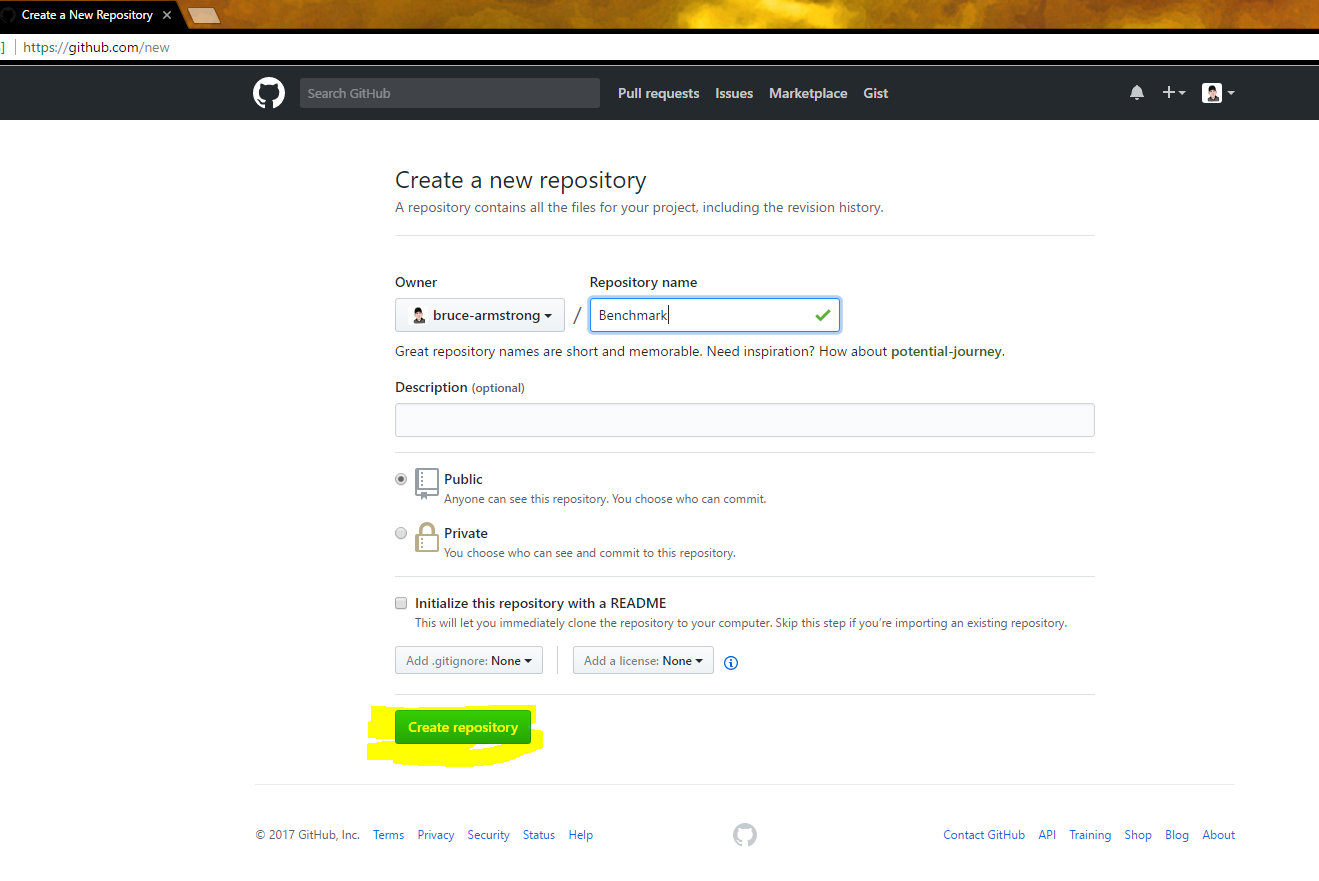
c. You should end up with a page that looks like the following. Keep it open, as we will need the url for the project in a later step.
7. Find the parent directory of the PowerBuilder code that you want to start hosting in GitHub, Right click on that directory and select the "Git create repository here" option.
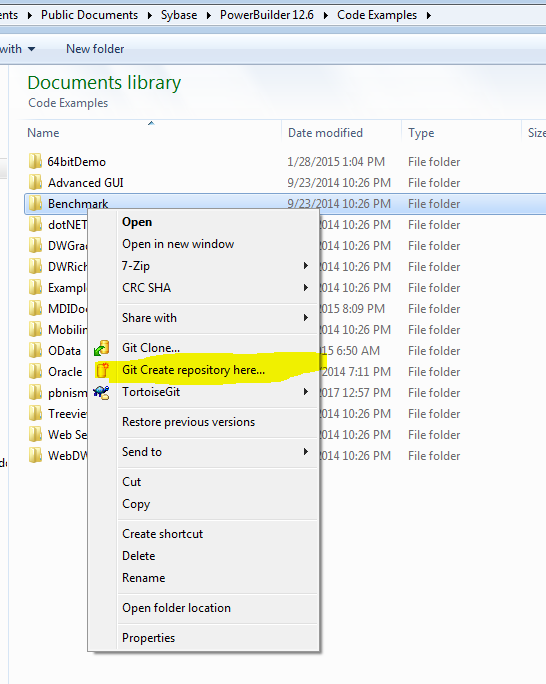
Leave the "Make it Bare" option unchecked and hit OK.
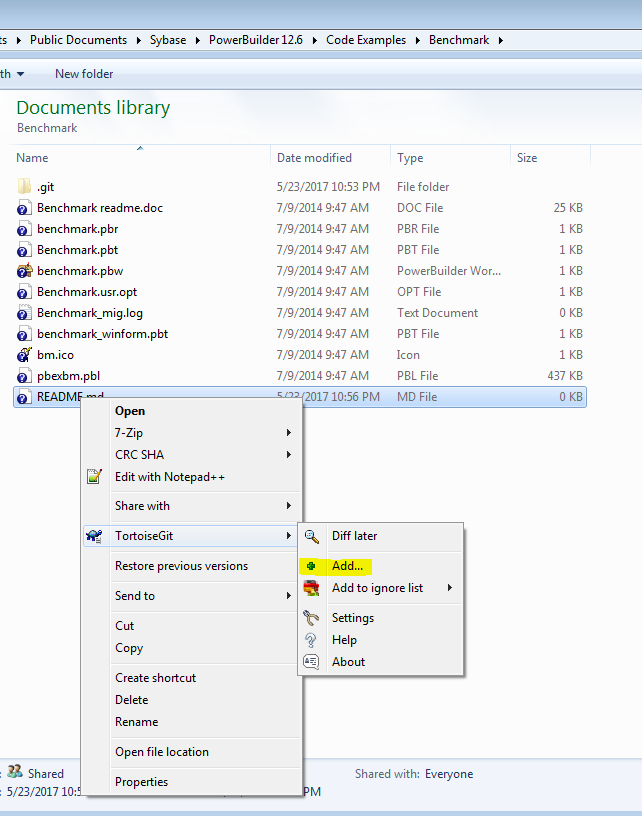
8. Open the directory, right click in it and create a new text document. Name the new text document README.md (with README in capitals).

9. Right click on the README.md file and select Add from the TortoiseGit menu option.
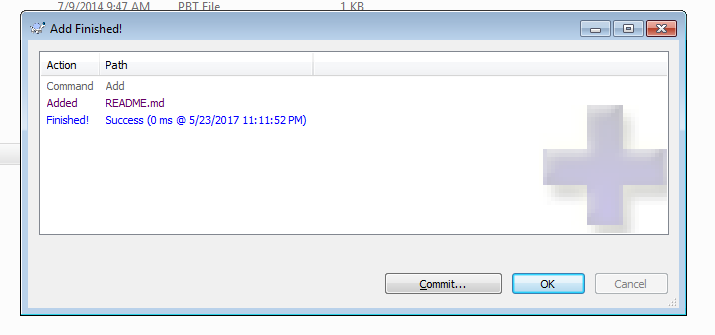
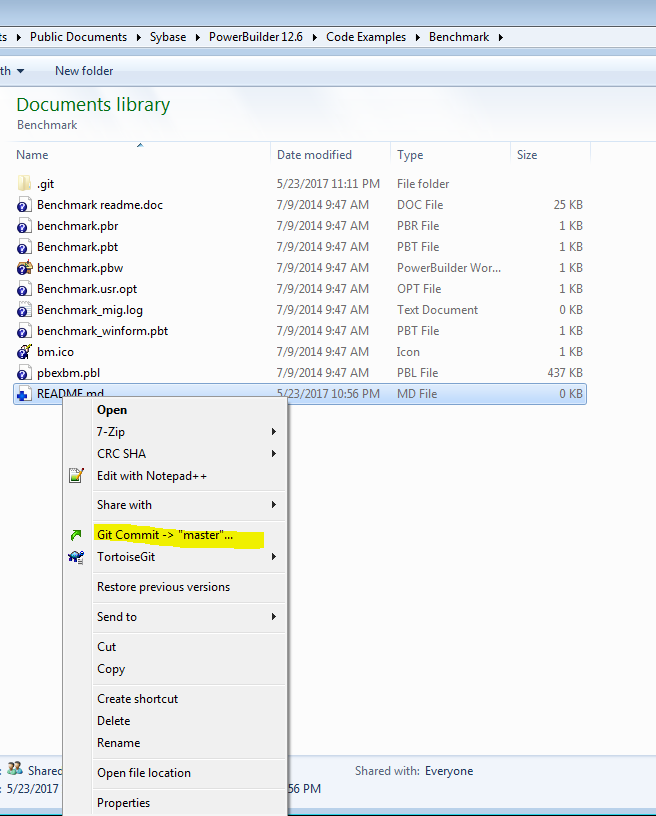
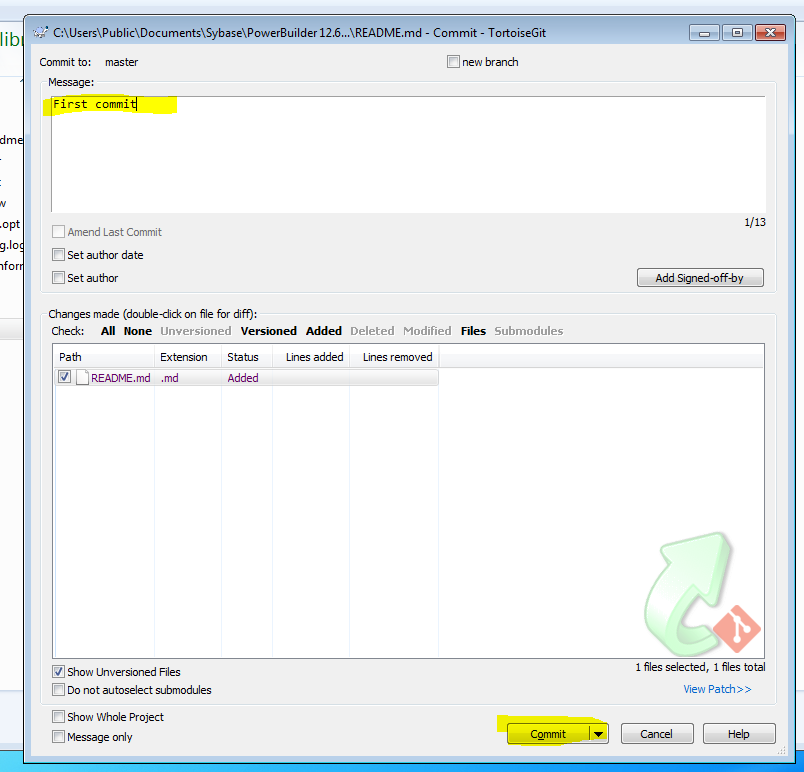
10. Right click on the file again and select "Git Commit -> "master" to commit the add to the local repository.
11. Right click in the background of the directory and select TortoiseGit Settings.
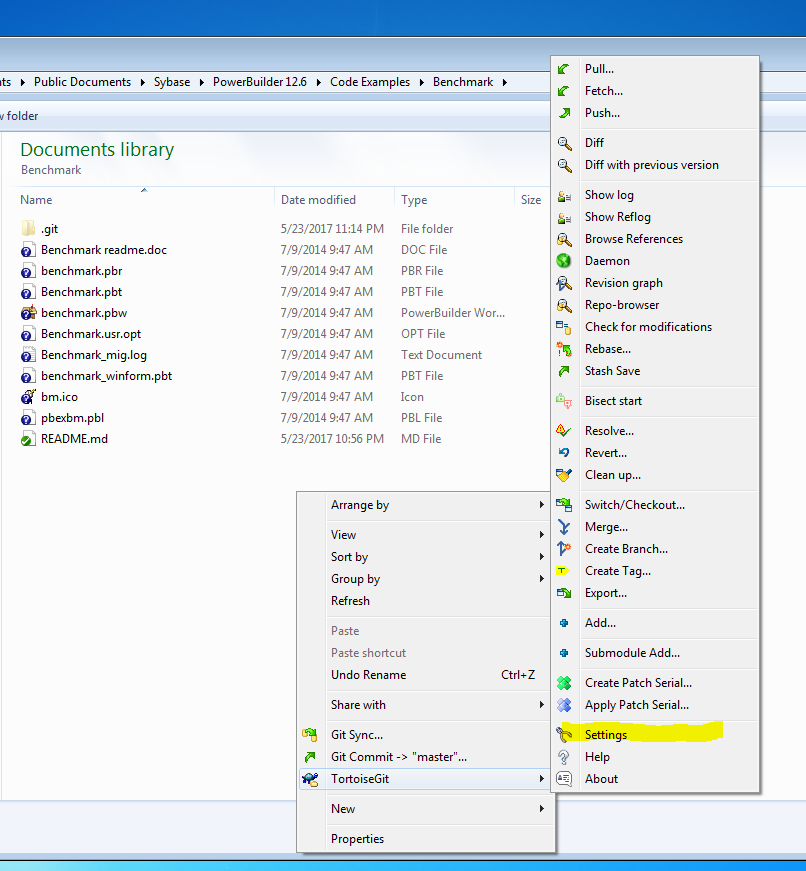
Click OK on the dialog that appears that explains hierarchical configuration.
12. In the settings, find Git - Remote. Enter the URL from the project in GitHub into the URL field and hit Apply.

Click "No" when asked if you want to fetch remote branches.
Press OK on the next dialog and you should see this result.

13. Right click in the directory background again, and this time select TortoiseGit -> Push.
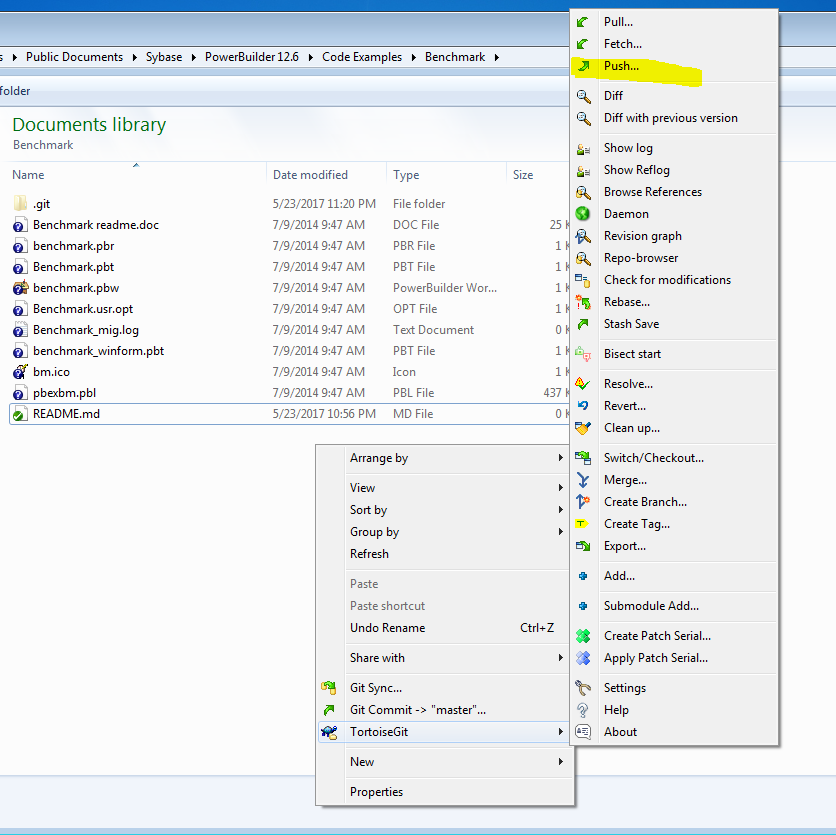
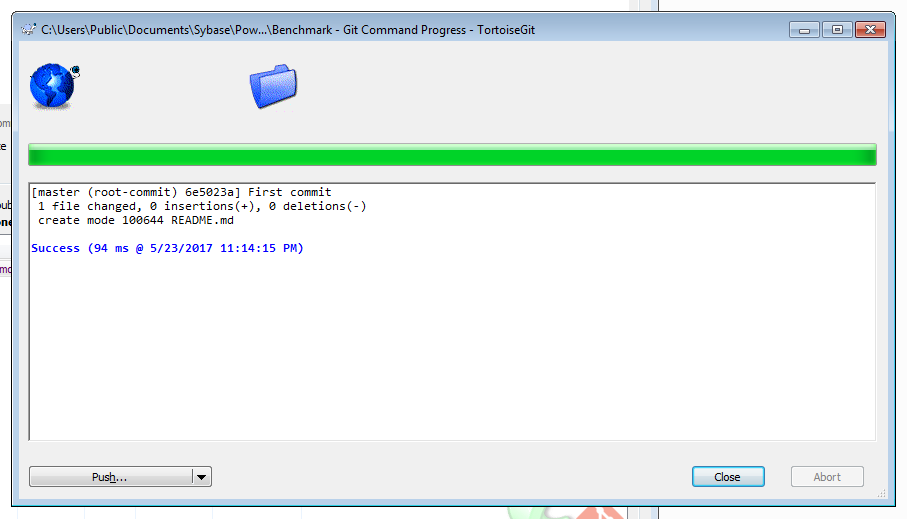
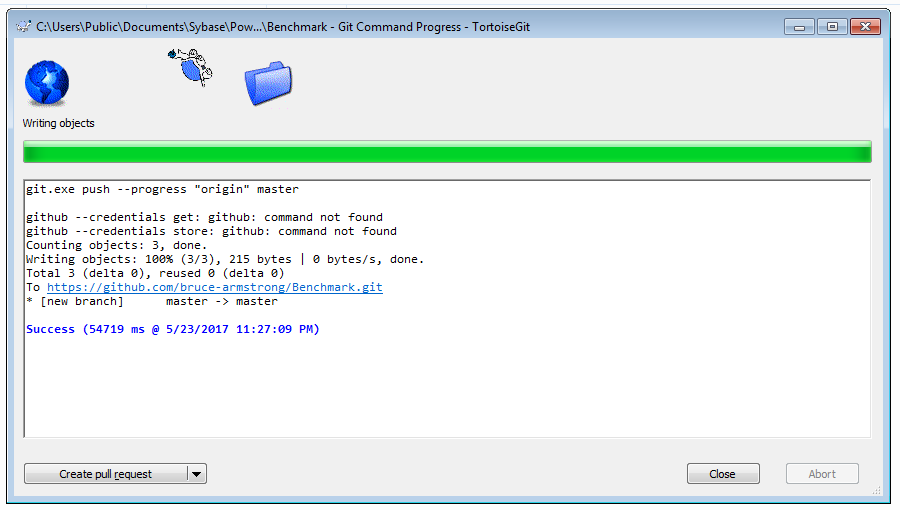
That takes the files that have been committed locally and updates the remote repository with them. You will be prompted for your GitHub username and password. You should see a summary dialog like this when you are done.
14. The repository is now ready for you to start working with it from PowerBuilder. Open up the IDE and the workspace in question.
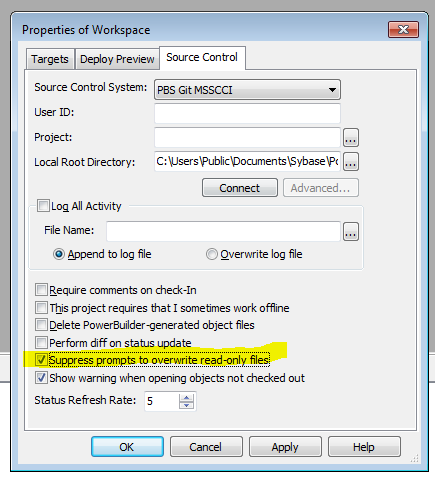
15. Open the workspace properties and select PBS Git MSSCCI from the list of source control systems.
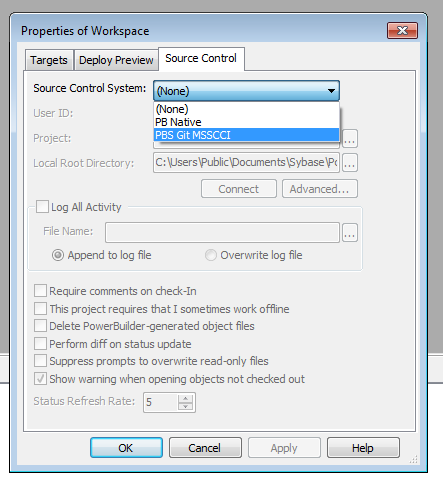
Make sure you check the "Suppress prompts to overwrite read-only files" option and hit Apply.
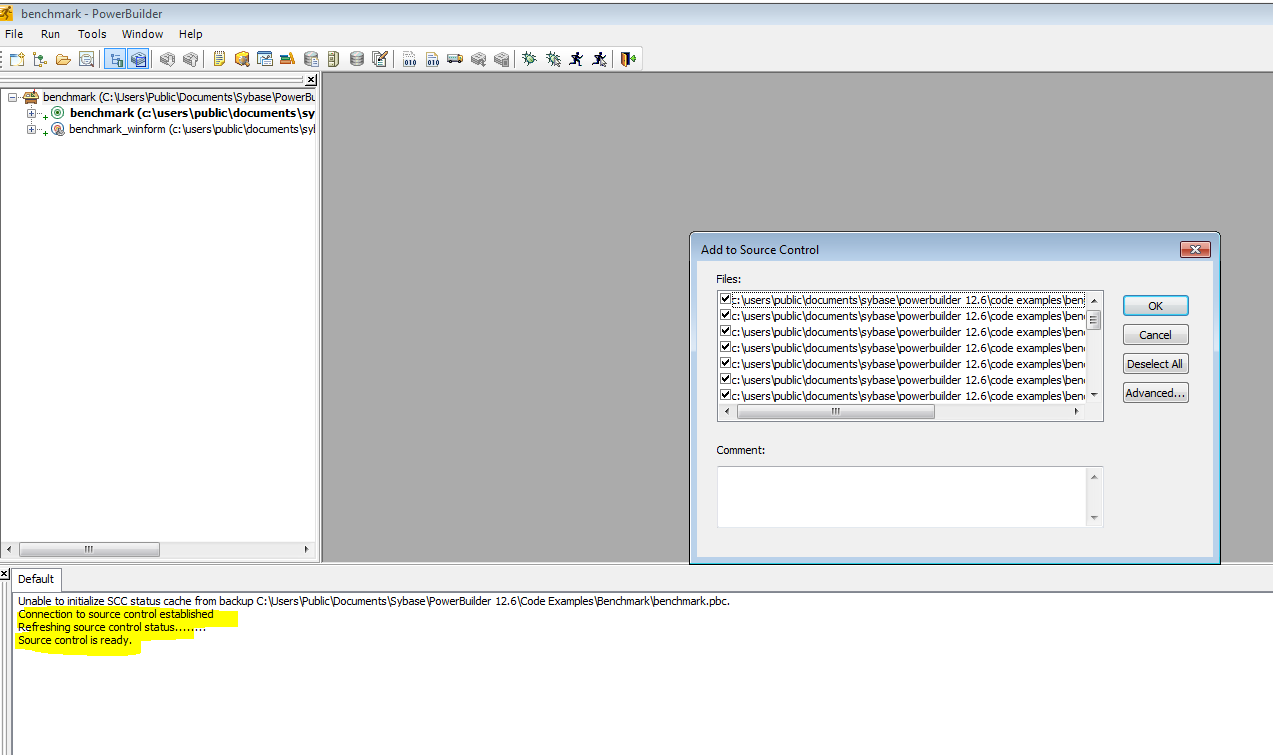
16. The output pane should indicate that the connection to source control was established. You can now right click on the workspace and select Add to Source Control.
17. Go back to the directory where the source code is at, right click in the directory and select TortoiseGit -> Push to send the PowerBuilder code to GitHub. Alternatively, you can use GitHub Desktop and the Publish option as shown below.
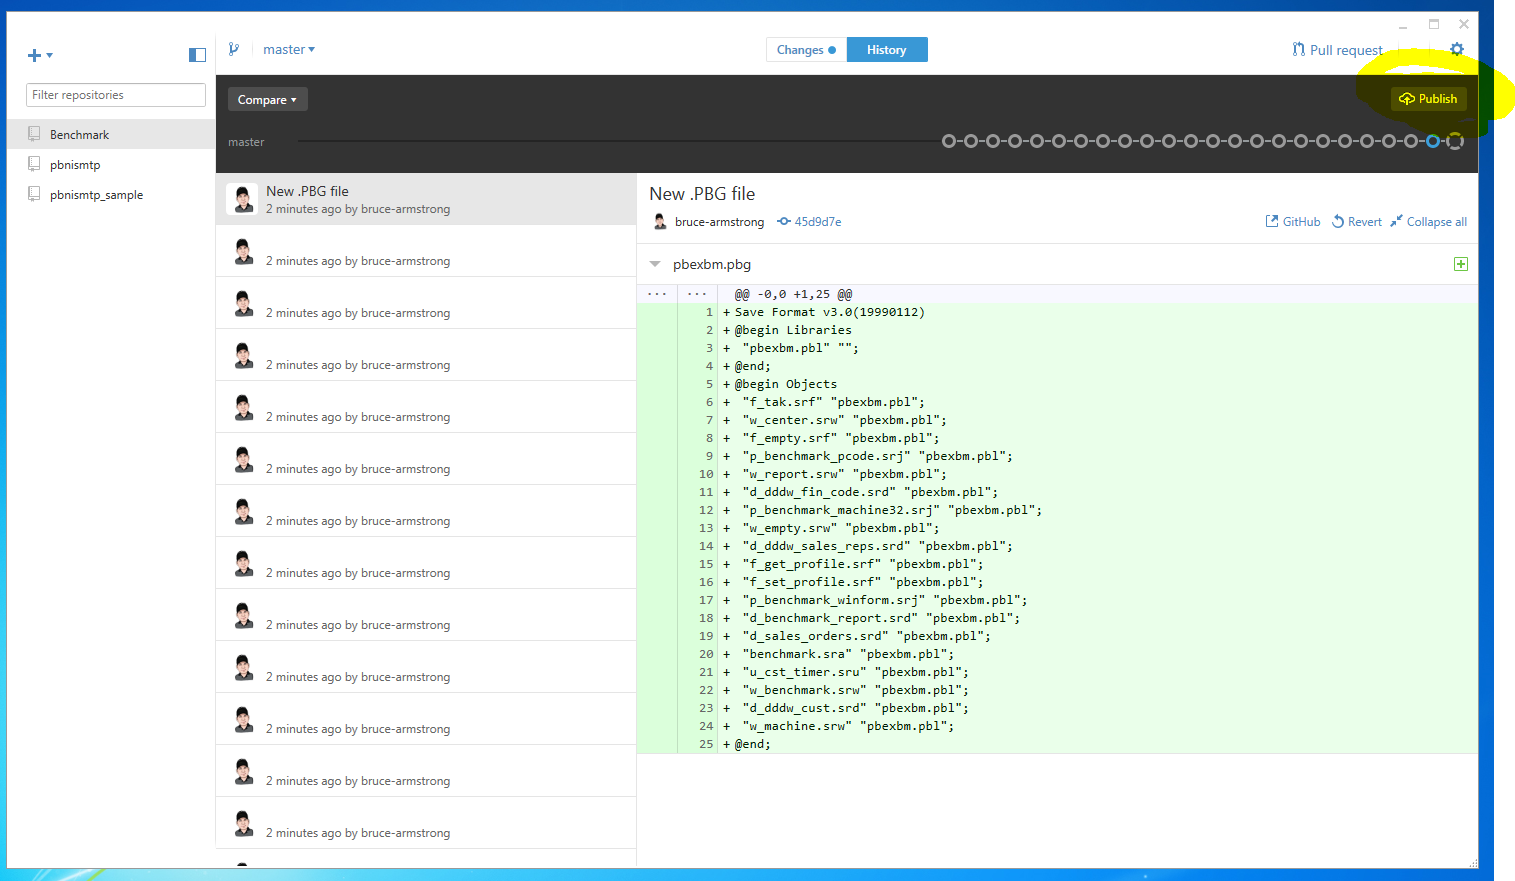
Initially you'll need to Add the local repository to GitHub Desktop so it knows to work with it.
18. Go back to your project in GitHub, refresh the page if necessary, and see all your code.

One thing to keep in mind is that Git is a distributed version control system. PowerBuilder talks to your local git repository, so you can work offline. You have to go online and do a sync with GitHub in order to post your changes and pick up changes from other users. You'll need to use TortoiseGit, GitHub Desktop, or even the git command line to do that.
On a final note, I'm not the first person to post PowerBuilder projects to GitHub, there are already a number of existing projects there.
Comments (7)